Category Archives: How-To

Steamed Salmon with Bok Choy


Salmon and Bok Choy, Microwave Steamed

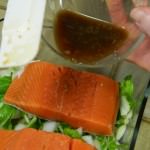
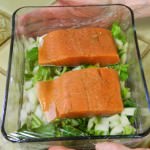
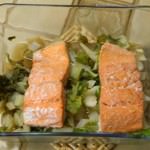
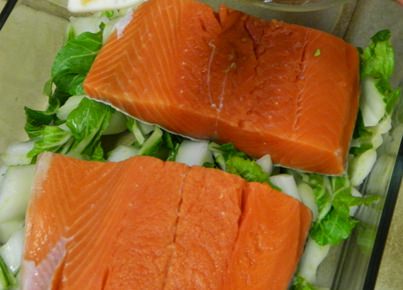
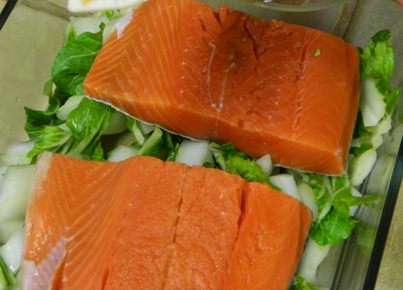
Salmon and bok choy before microwave steaming.

Salmon and bok choy before microwave steaming.

How do you buy your salmon?  I really like it fresh, though sometimes for economy and time-saving, frozen from a ‘big box store’ is easiest.   I always look to see how and where the salmon grew up.  When possible, I will get a fresh large filet and cut into serving sizes and freeze remainder for later use. Most of my recipes for salmon are broiled or baked, sometimes sautéed.  The Microwave Steamed Salmon and Bok Choy is a one dish meal with no extra oil or fat added. When using frozen salmon filets, thaw in  refrigerator. To prepare, wash and remove scales from salmon, rinse and dry.

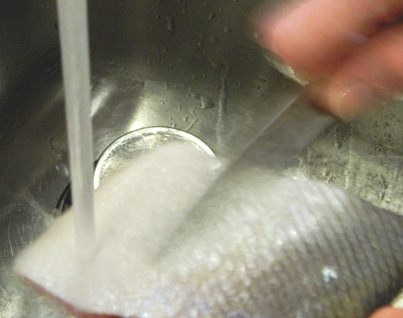
Washing and cleaning the scales off the salmon filet.

Washing and cleaning the scales off the salmon filet.

Diet wise, it is smart to eat salmon at least once a week.  The omega-3, high in protein, and vitamins D, B12 and 6 are all found in the salmon. Canned salmon has all the same nutrients plus calcium because the bones are included.  When first married, salmon patties were the last resort meal before the next pay-day.  I am sure some of you can relate.

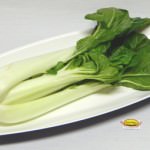
There are so many vegetables available that I did not see when first married, soon to be 50 years ago.  Bok choy is one.  Bok choy, also known as Chinese cabbage.  It is good in stir-fry, addition to chicken soup or even chicken broth for a light soup.  It is a vegetable to be eaten raw in salads or in coleslaw  Bok choy is a zero calorie recommended vegetable.  It is rich in vitamins A, C and K  as well as potassium and calcium to name a few.

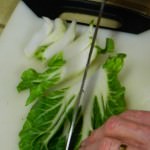
Thoroughly wash bok choy stalks and leaves to remove dirt and grit.  Cut the wide stalks in half lengthwise and slice both the white stalk and leaves into 1/2-inch pieces. Put the bok choy in the bottom of a microwave dish.  Lay the salmon filets on top.

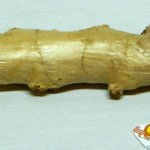
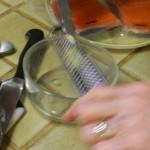
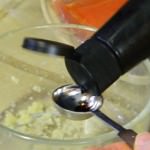
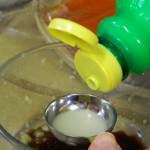
In a small bowl, mix the ginger, reduced-sodium soy sauce and lemon juice.  Pour over the filets and bok choy.  Cover the dish with plastic wrap, leaving a corner uncovered to vent.

Microwave the salmon and bok choy 5-9 minutes on high.  The salmon will be light pink in the center and tender when done.  Lightly prick the filets with a fork to test for flakiness.

 Microwave Steamed Salmon with Bok Choy
Microwave Steamed Salmon with Bok Choy

Julia Ann
A healthy one-dish meal without extra oil or fat added. Gain the benefits of omega-3 and protein of salmon and zero bok choy calories.
Prep Time 20 minutes
Cook Time 9 minutes
Total Time 29 minutes
Course Seafood
Cuisine Asian
Servings 2

Ingredients
  

  • 2 5-6 ounce frozen or fresh salmon filets

Instructions
 

  • Prepare in a microwave casserole.
  • Wash and remove scales from salmon, marinate in 1-2 tablespoons lemon juice.
  • Thoroughly wash bok choy to remove dirt and grit.
  • Cut leaves and stalk in half lengthwise, slice into 1/2-inch pieces.
  • Place bok choy in the bottom of casserole.
  • Drain and dry salmon, place on top of bok choy.
  • In a small bowl, mix the ginger, soy sauce and lemon juice.
  • Pour over salmon and bok choy.
  • Cover with plastic wrap, leaving corner uncovered to vent.
  • Microwave dish 5-9 minutes on high.
  • Salmon will be flaky when pricked with a fork to test for doneness.

Notes

cookbookinabox® in partnership with Netta Belle’s Choice®  bring you great recipes for your cooking experience.
©2007-2018 Netta Belle’s Choice® cookbookinabox® “Reg. U.S. Pat. & Trdmk.Off.” Reg. “Trade-marks Canadian Intellectual Property Office.” nettabelleschoice.com and cookbookinabox.com. All rights reserved.
Tried this recipe?Let us know how it was!


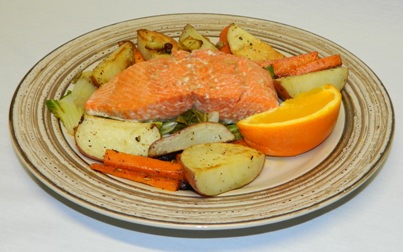
For this particular meal, I roasted root vegetables to serve with the microwave steamed salmon with bok choy.

Microwave steamed salmon with bok choy and roasted root vegetables.

Microwave steamed salmon with bok choy and roasted root vegetables.

cookbookinabox® in partnership with Netta Belle’s Choice® bring you great recipes for your cooking experience.

Netta Belle's Choice cookbookinabox©2007-2018 Netta Belle’s Choice® cookbookinabox® “Reg. U.S. Pat. & Trdmk.Off.” Reg. “Trade-marks Canadian Intellectual Property Office.” nettabelleschoice.com and cookbookinabox.com.  All rights reserved.

Preserving San Marzano Tomatoes

Preserving San Marzano Tomatoes

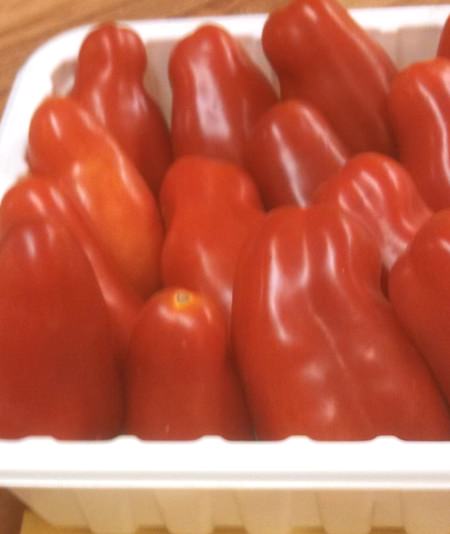
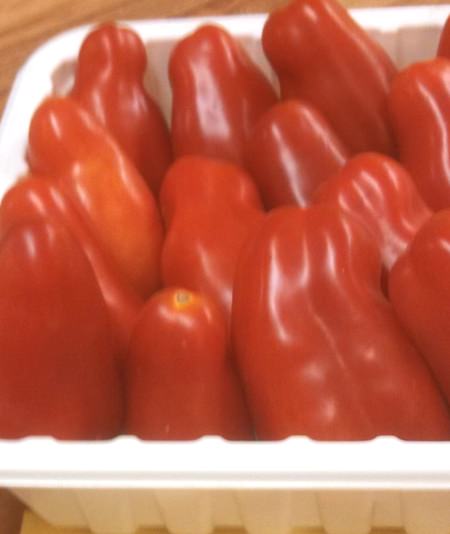
Fresh San Marzano Tomatoes

At the local farmer’s market I bought San Marzano Tomatoes.  I had not seen them before and took the opportunity to try them and preserving some.  They are similar to a Roma tomato, long shaped and meaty, with small core and few seeds.

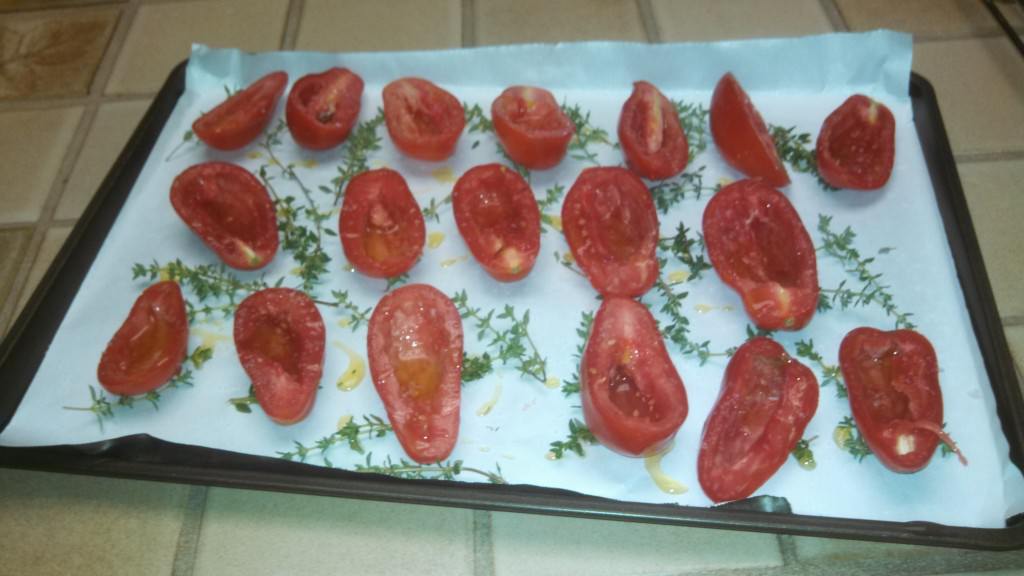
I washed them, poured boiling water over for 3-4 minutes, then put into ice water bath. The skin peeled off easily.  They were cut in half and laid out on a pan lined with parchment paper.

San Marzano tomatoes ready for oven drying.

San Marzano tomatoes ready for oven drying.

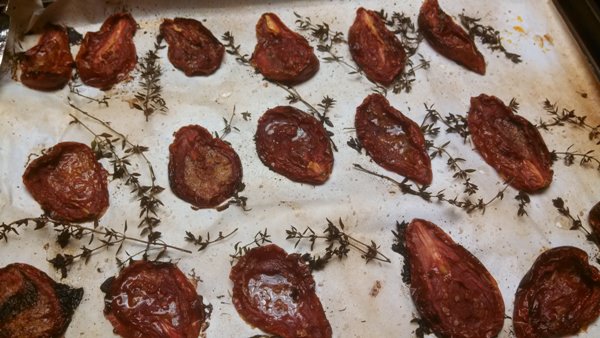
Fresh thyme was put on the paper, then topped with the tomato halves.  I sprinkled olive oil and Kosher salt on tomatoes and baked at 450°F for 15 minutes.  The oven was turned off and the pan of tomatoes were left in the oven for 2 hours to dry.

Oven Dried San Marzano Tomatoes

Oven Dried San Marzano Tomatoes

Preserving San Marzano Tomatoes

Julia Ann
This is an easy recipe for fixing home oven-dried tomatoes as a means of preserving for later use.
Prep Time 1 hour
Cook Time 3 hours
Total Time 4 hours
Course Oven Dried Tomatoes
Cuisine American
Servings 3 cups

Ingredients
  

  • 2 pounds of San Marzano tomatoes

Instructions
 

  • Wash and remove tomato skins by pouring boiling water on them for 3-4 minutes.
  • Drain, put into an ice water bath.
  • Peel tomatoes, skins come off easily.
  • Cut tomatoes in half, remove core and seeds.
  • Drain on toweling or a towel.
  • Put parchment paper on cookie sheet, spread thyme sprigs on paper.
  • Place the tomatoes on top of thyme.
  • Drizzle olive oil over tomatoes and season with Kosher salt.
  • Bake at 450 F for 15 minutes.
  • Turn off the heat, let tomatoes dry out for 2-3 hours.
  • Put into jelly jars and cover with olive oil.
  • Refrigerate. Olive will become solid, but will melt when setting out to use.

Notes

©2007-2018 Netta Belle’s Choice® cookbookinabox® “Reg. U.S. Pat. & Trdmk.Off.”
Reg. “Trade-marks Canadian Intellectual Property Office.” nettabelleschoice.com and cookbookinabox.com. All rights reserved.
Tried this recipe?Let us know how it was!


I put the tomatoes into jelly jars and partially covered with olive oil and stored in the refrigerator. They were soon used in salad, soup and sauce and soon were gone.  They were softer than the commercial dried tomatoes and much better flavor.  I could be partial.

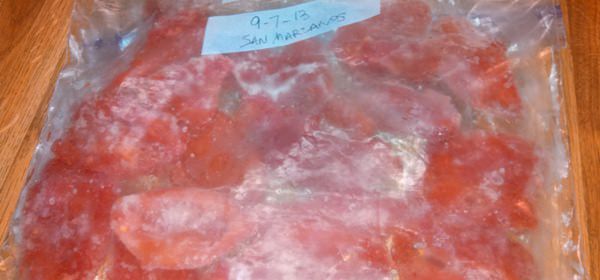
I prepared the next 2 lbs of San Marzano Tomatoes as for drying, except I put them in freezer bag in one layer and froze them.  I haven’t cooked with those yet.

Frozen San Marzano Tomatoes

Frozen San Marzano Tomatoes

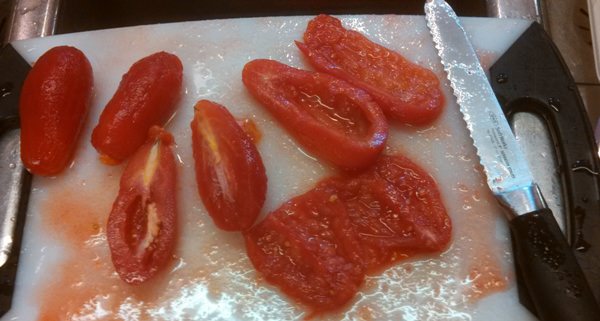
There were about 1 1/2 pounds of the tomatoes left, so decided to make a puree. The preparation was removing skins, cutting in half, removing core and the seeds.  I put them into blender, pureed until smooth.  I had 1 1/4 cup of puree which was cooked in small kettle with 1/4 teaspoon salt and 1 teaspoon sugar.  I cooked to reduce it to one-half.

Preparing San Marzano Tomatoes to make puree.

Preparing San Marzano Tomatoes to make puree.

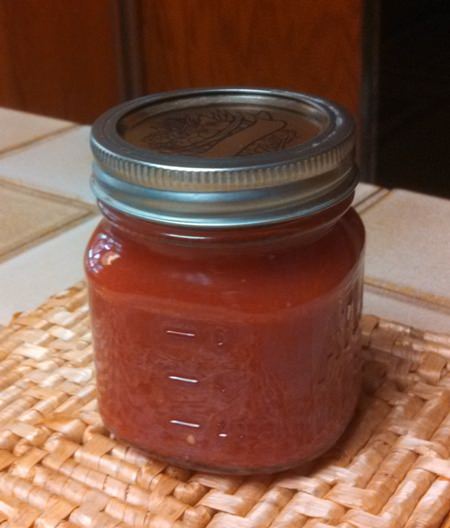
I poured it into a 1/2 pint jar which was hot from boiling and covered with lid and ring.  I sat it into a pot of hot water which covered the jar letting it come to rolling boil and let boil for 20 minutes.  Then removed the can from the hot water to cool for 24 hours and also to seal the lid.

1 cup of seasoned Canned San Marzano Puree.

Preserving  seasoned  San Marzano Puree.

I hope this will give you incentive to try San Marzano Tomatoes and to give drying, freezing and canning a try.  When doing it in small amounts, it is more manageable in time and space to work and for storage.

Have you done canning, freezing or drying?  Please let me know what you have preserved.

cookbookinabox® in partnership with Netta Belle’s Choice®bring you great recipes for your cooking experience.

Netta Belle's Choice cookbookinabox©2007-2018 Netta Belle’s Choice® cookbookinabox® Reg. U.S. Pat. & Trdmk.Off.” Reg. “Trade-marks Canadian Intellectual Property Office.” nettabelleschoice.com and cookbookinabox.com.  All rights reserved.

Peaches: Canned and in a Cake

How To Can Fresh Peaches

Canning Fresh Peaches and Baking a Cake

Canning fresh peaches and baking  a cake makes for good eating, not for dieting. 6 pounds of Velvet peaches from the farmer’s market made 6 pints of canned sliced peaches in a light sugar syrup: 1 cup sugar to 3 cups of water. After washing the peaches,  boiling water was pour over them for about 40 seconds, lifted out of  hot water into an ice water bath to cool and loosen the peel enough to slide off easily. I sprinkled on some lemon juice to prevent browning then cut the peaches in half-inch slices.  These peaches were freestone, that is, the peach stone came out easily.

Before the canning, I washed the pint jars in the dish washer and left them until ready to fill.  I also boiled lids and jar rings in water, kept hot until ready for use.  By canning in a hot water bath, I started the water boiling in the canner before starting. The sugar syrup also was made ahead to have hot, close to boiling point, to add the sliced peaches for 5 minutes.  The hot peaches were put into pint jars,  sugar syrup was added leaving 1/2 inch space; lids and rings were put on.  The pints were put into the boiling water of the canner, covered to boil for 20 minutes. (Process time varies at different altitudes.) The jars were lifted out, carefully, and set on a towel to cool.  The lids will pop when they are sealed.  After cooling 24 hours, they can be stored on the shelf.¹

 Did you know fresh peaches are recommended in weight control?

There are less than 70 calories in a large peach, and no fat.  Yes, there is sugar, a carbohydrate, however it is a natural sugar which also have vitamins and minerals, unlike the carbohydrates eaten in cakes, cookies and sodas.  Other benefits to eating fresh peaches are vitamin A and C, fiber and potassium.  Add them to cereals, smoothies, cottage cheese, yogurt, lettuce salads or baked ham.²

Now how about a recipe for Peach Upside Down Cake with calories!

PEACH UPSIDE DOWN CAKE RECIPE

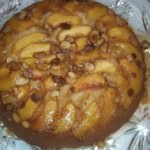
Peach Upside Down Cake

Julia Ann
A buttery moist cake topped with sweet fresh peach slices with a syrup drizzling over it.
Prep Time 20 minutes
Cook Time 50 minutes
Total Time 1 hour 10 minutes
Course Dessert
Cuisine American
Servings 8

Ingredients
  

  • 1/4 cup unsalted melted

Instructions
 

  • Preheat oven *325 F for 10-inch glass pie plate; 350 F for 10-inch cake pan.
  • **Place foil on bottom shelf to catch any dripping juices.
  • ***Wash and slice peaches into 1 tablespoon lemon juice, gently coat peach slices.
  • Mix brown sugar with melted butter in a small bowl.
  • Spread evenly on bottom of pie plate or cake pan
  • Add toasted almonds.
  • Drain juices off peaches; arrange peaches on sugar-butter mixture.
  • Measure and blend dry ingredients in bowl.
  • In a large mixing bowl, cream butter and sugar until light and fluffy.
  • Add eggs one at time, beating after each addition.
  • Beat in almond extract.
  • Alternately add the dry ingredients and the milk, beat after each addition to blend.
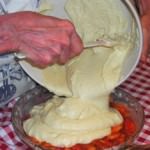
  • Pour batter on top of peaches.
  • Bake 45-55 minutes, test for doneness by inserting tester in center; it comes out clean when done.
  • Serve warm with whip cream or ice cream.

Notes

*Baking in glass takes longer to heat up, but maintains temperature. If there is much sugar in the recipe, it is best to bake at 25 degrees lower to prevent burning the sugar before it is baked through. **Putting foil in the oven while it is preheating brings the foil up to the oven temperature. The sheet will catch any juices while baking. ***Adding lemon juice to the fresh sliced peaches prevents browning. This is drained off before using the peaches.
cookbookinabox® in partnership with Netta Belle’s Choice® es, bring you great recipes for your cooking experience. ©2007-2018 Netta Belle’s Choice® cookbookinabox® “Reg. U.S. Pat. & Trdmk.Off.” Reg. “Trade-marks Canadian Intellectual Property Office.” nettabelleschoice.com and cookbookinabox.com. All rights reserved.
Tried this recipe?Let us know how it was!


 Additional information on canning, freezing or drying
Inspired by ³Gourmet Magazine, 1993.

cookbookinabox® in partnership with Netta Belle’s Choice® bring you great recipes for your cooking experience.

Netta Belle's Choice cookbookinabox©2007-2018 Netta Belle’s Choice® cookbookinabox® “Reg. U.S. Pat. & Trdmk.Off.” Reg. “Trade-marks Canadian Intellectual Property Office.” nettabelleschoice.com and cookbookinabox.com.  All rights reserved.


Savory Baked Sweet Corn Recipe

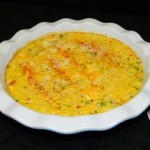
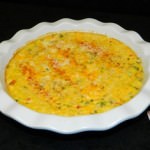
Netta Belle’s Choice Savory Baked Sweet Corn

Julia Ann - Summertime Corn

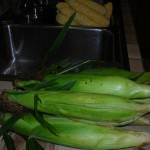
Slected fresh corn from a local farmer’s market. The husks will be removed to prepare the ears of corn for parboiling.

Indiana sweet corn is at its peak; the yellow and/or white kernels are full and crisp with sweet milky juice. Corn on the cob, or roasting ears are the summertime treat, to be eaten and preserved by canning or freezing. Corn is a versatile vegetable used in soups, salads, side dishes, cornbreads, and entrees.  There are multiple uses of corn from corn syrup, snack foods, pet foods and ethanol.

The nutrients in corn are fiber, vitamin C, vitamin B 3, manganese and vitamin B 5 and antioxidant benefits. There are 143 calories in 1 cup of corn, not counting added butter when eating corn on the cob.  Fresh picked corn is best used the same day, or kept cool or refrigerated or has been in the shade at the farmer’s market.  Heat causes natural sugars of corn  turn to starch losing some of its sweet taste. Select corn with full kernels, when punctured the juice is white.  Fresh corn will have green husks tightly around it and not dried out.

Corn can be steamed, cooked in boiling water, grilled in the husk, microwaved or put in the oven to bake in the husks. Whole corn is cutting the kernel off the cob; fixing  cream corn is cutting the  kernels off the cob, then scraping sides to get the sweet milky juice.

Savory Baked Sweet Corn Recipe

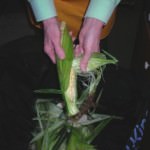
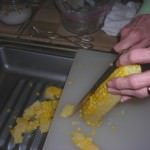
I purchased the corn for  Savory Baked Sweet Corn  soon after the corn had been brought in from the field at a local farmer’s market.  It was a yellow and white variety with plump firm kernels, rows complete to the very top of the ear. The husks and silk were removed. The water was heated in a kettle until boiling, corn was added to come to boil again for 7 minutes. When done, the corn was put in ice water to cool before cutting. This is also prepares corn for freezing. Four large ears of corn were used to get the 2 cups of corn.  The kernels were cut off, the cobs were scraped to get the sweet milky juice. The corn was set in the refrigerator until ready for use.

Savory Baked Sweet Corn Recipe

Julia Ann
Summer fresh corn is just right for a Savory Baked Sweet Corn Casserole. A dish for family or a pot luck dinner.
Prep Time 15 minutes
Cook Time 45 minutes
Total Time 1 hour
Course Casserole
Cuisine American
Servings 6 -8

Ingredients
  

  • 1 teaspoon butter to grease a 1-quart casserole dish

Instructions
 

  • Preheat oven to 350 F. Butter casserole dish.
  • Combine flour, sugar, seasonings in large bowl.
  • Melt butter to cook onion until softened.
  • Add the milk, beaten eggs, cream corn, buttered cooked onion, cheese, parsley and crumbs to the dry ingredients.
  • Stir to blend well.
  • Pour into the buttered casserole.
  • Sprinkle top with paprika.
  • Bake 45 minutes or until set.
  • Test for doneness by inserting knife in center and it comes out clean.

Notes

cookbookinabox® in partnership with Netta Belle’s Choice® bring you great recipes for your cooking experience.
©2007-2018 Netta Belle’s Choice® cookbookinabox® “Reg. U.S. Pat. & Trdmk.Off.” Reg. “Trade-marks Canadian Intellectual Property Office.” nettabelleschoice.com and cookbookinabox.com. All rights reserved.
Tried this recipe?Let us know how it was!

* Turmeric is a medicinal root with anti-inflammatory, antioxidant properties grown in South Asia of India and Pakistan.  The rhizomes are boiled, dried and ground into a powder for use as spice for cooking and in curries.  The orange-yellow color spice has a slightly hot peppery flavor and will color the food yellow when cooked.

Granulated Black Peppecookbookinabox® in partnership with Netta Belle’s Choice®  bring you great recipes for your cooking experience.

Netta Belle's Choice cookbookinabox©2007-2018 Netta Belle’s Choice® cookbookinabox® “Reg. U.S. Pat. & Trdmk.Off.” Reg. “Trade-marks Canadian Intellectual Property Office.” nettabelleschoice.com and cookbookinabox.com.  All rights reserved.
Beets with Balsamic Vinegar

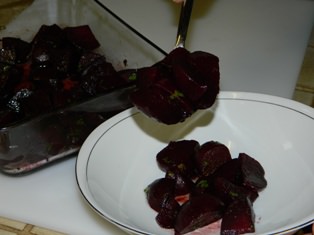
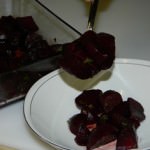
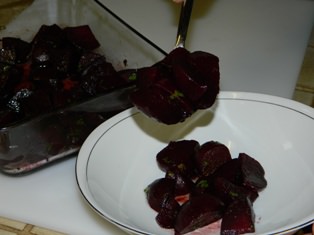
Serving roasted beets with balsamic vinegar.

Serving roasted beets with balsamic vinegar.

Beets with Balsamic Vinegar

Beets are available June to August at the farmer’s markets.  They are available year round in the grocery. Harvard and pickled beets are most common recipes used.  Beets with Balsamic Vinegar can be served hot or cold in a lettuce salad.

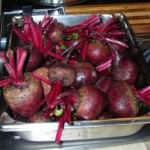
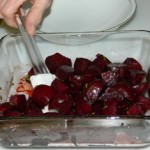
I trimmed the greens to about 4 inches top of beet and left root attached. It is recommended steaming for 15 minutes to prevent loss of vitamin B, manganese, potassium, vitamin C and benefits from the red or yellow pigments. After washing, I put them in a Presto Pressure Cooker with 1 1/2 cups  water and cooked under pressure for 15 minutes.  After briefly cooling in cold water, the skins easily slide off without peeling.  The beets were cut into 1-inch  pieces into an oven-proof dish.

I blended the canola oil, balsamic vinegar, salt and pepper. This was  poured over the cooked beets and stirred to coat the pieces.  They were baked at 425°F for 10 minutes and served hot.. Beets not eaten were refrigerated and later added to a lettuce salad.

Beets with Balsamic Vinegar

Julia Ann
A tangy taste to beets to eating hot or cold. Add to a lettuce salad for color and great taste.
Prep Time 30 minutes
Cook Time 25 minutes
Total Time 55 minutes
Course Vegetables
Cuisine American
Servings 4

Ingredients
  

  • 6-8 beets 2 inches in diameter

Instructions
 

  • Preheat oven to 425 F
  • Prepare oven-proof dish for baking.
  • Wash and trim beets, leaving 4 inches of stems on top and the root end.
  • Steam in pressure cooker or steamer for 15 minutes.
  • Briefly cool in water.
  • Slide the skin off the beets.(Use plastic glove to prevent staining hands.)
  • Cut beets into 1-inch cubes, lay in baking dish.
  • Whisk together canola oil, balsamic vinegar, salt and pepper.
  • Pour over the beets turning to coat evenly.
  • Bake for 10 minutes.
  • Remove to serving dish.
  • Sprinkle with chopped fresh parsley.

Notes

cookbookinabox® in partnership with Netta Belle’s Choice® bring you great recipes for your cooking experience. ©2007-2018 Netta Belle’s Choice® cookbookinabox® “Reg. U.S. Pat. & Trdmk.Off.” Reg. “Trade-marks Canadian Intellectual Property Office.” nettabelleschoice.com and cookbookinabox.com. All rights reserved.
Tried this recipe?Let us know how it was!

 About Balsamic Vinegar

It is not made from wine, it is made from the grape pressings which have not been fermented into wine. The pressings are of the sweet white Trebbiano grape boiled down into a dark syrup and aged in a series of barrels. True Italian balsamic vinegar is controlled by strict laws – it must be aged no less than 12 years and some even longer. The best Italian vinegar is from Modena in Northern Italy.
(Original recipe from Harvard University Dining Services)

Netta Belle's Choice cookbookinabox

cookbookinabox® in partnership with Netta Belle’s Choice®  bring you great recipes for your cooking experience.

©2007-2018 Netta Belle’s Choice® cookbookinabox® “Reg. U.S. Pat. & Trdmk.Off.” Reg. “Trade-marks Canadian Intellectual Property Office.” nettabelleschoice.com and cookbookinabox.com.  All rights reserved.